Monday, October 26, 2009

philosophy of art education

My philosophy of Art Education begins with the idea that all students can and should create art. The ideal classroom would be one where everyone is engaged and excited about the entire process of making art. Students should be thoughtfully guided through lessons that allow them to apply previous knowledge, while also introducing new information and various cultural exemplars to inspire them.

Students should definitely be supported in their creative pursuits, but they also deserve constructive criticism so that they have a chance to improve where they can. Art should inspire the viewer as well as the creator, and in the same sense a successful art classroom is one where both the teacher and student are fully engaged. I hope to constantly learn and grow as an educator, so that I can confidently offer advice and input that will lead students to becoming a better version of themselves, as artists.

Art is a subject that is dynamic because it is hands on and so flexible. Lessons should be planned that are thoughtful and exciting, but also attainable for the appropriate age group. Curriculums should be tweaked to keep pace with the aspects and lessons the students show the most enthusiasm for.

One of the reasons Art Education is so exciting because there is the opportunity to expand a student’s world through information as well as hands on experiences. Interdisciplinary and multicultural lessons should be included as often as possible, to help give context to the students and to enforce what they are learning in other classes. The impact of using various examples and subjects to illustrate a lesson is much greater than a simple cut and dry lecture.

Whenever it’s appropriate, music or audio tracks should be integrated into the work time, to help the students focus and relax. Setting a comfortable mood in the classroom seems key in having successful results. Tapping into the student’s sense of hearing while they are concentrating allows additional opportunities for intellectual stimulation.

Art Education is an extremely exciting field to be a part of. Since there are no rights or wrongs in art, each student should feel comfortable with the outcome of their work while still attempting to create the best piece possible. The importance of craft and technique should be focused on, but the student should have the opportunity to throw caution to the wind if their heart is in a project.


Sunday, October 25, 2009

paper cut tree


katie shields, 10/18/09

Saturday, October 24, 2009

sense of place lesson plan

Instructor: Katie Shields

Title: Sense of Place Silhouette

Grade Level: 8th

Brief History: Cutting paper to create art is a technique that has been around for centuries and is apparent in many different cultures. The earliest examples of paper cutting come from China and dates all the way back to the sixth century. Since then, the craft has been used in Indian, Mexican, European, Japanese, and Israeli art.

In today’s society, the use of using cut paper to create a silhouette is everywhere. Contemporary artists like Banksy and ad campaigns like Apple’s Ipod are good examples of the modern twist this traditional technique has taken.

Standards:

9.1.8 (A, B, C, H)

9.3.8 (B, D, E)

9.4.8 (A)

Goals:

To create a paper cut silhouette of the student’s own “sense of place” – i.e. a place where they feel thoughtful and comfortable.

Objectives:

  1. Carefully choose an image of the student’s own “sense of place” that can be translated into a 2d silhouette.
  2. Apply techniques learned to construct image.
  3. Explain the meaning behind their work.
  4. Participate in an open group discussion about each students work.
  5. Create a paper cut silhouette that focuses on craft and technique as well as design.

Requirements:

Create a 2d image out of cut paper and speak about its meaning to the class.

Resources/Materials/Visual Arts:

Exemplars of traditional and modern paper cut art

Books about the technique of cutting paper

Demo by teacher including exemplar

Materials/Supplies:

Construction Paper

Scissors

Xacto blades

Glue

Teacher Preparation:

Teacher will:

- Create an exemplar prior to lesson to show class

- Come prepared with books and materials for inspiration

- Create vocabulary list

- Demonstrate technique in class for the students

- Be available for questions and concerns as they pop up

Introduction: Gauge how much students know about paper cut artwork. Where do they see silhouettes in every day life? How do these silhouettes compare to the more traditional paper cut artwork of other cultures? How can they take an image in their mind and translate it into a 2d silhouette?

Directions:

  1. Think of an image that defines your own personal “sense of place” – a place where you can be thoughtful and comfortable.
  2. Sketch out the image on a piece of paper, taking careful consideration of the outlines and shape of the image.
  3. Make sure to include any details that may be important to cut away from inside the image (ex: windows on a house).
  4. Begin to cut the image out of the paper, starting with the outside and working inwards.
  5. Carefully glue finished cut image onto a piece of construction paper.
  6. Speak about the meaning of your image!

Closure:

Students will pin up their own images and participate in a group discussion/critique.

Critique/Evaluation/Assessment:

Students will hang their own work and discuss the meanings behind their own “sense of place” images. Attention will also be paid to particular images that work the best as 2D silhouettes, and why.

Extensions:

If students finish early:

  1. They can work on another paper cut image.
  2. They can examine the examples of the traditional and modern paper cut artwork.

Time Allotment: (1) 50 minute class

- 8 minutes – introduction

- 30 minutes – work time

- 2 minutes – clean up

- 10 minutes – critique/discussion

Vocabulary:

Silhouette - can refer to the art of cutting outlines or portraits out of black paper

Kirie - the Japanese art of paper cutting

Sanjhi - the Indian art of paper cutting

Scherenschnitte - means "scissors cutting" and is the German and Swiss art of paper cutting

Papel picado - the Mexican art of paper cutting

Safety concerns:

Teacher will express the importance of being careful with the Xacto blades and scissors, and closely monitor the students as they use these tools.

Bibliography / References:

http://en.wikipedia.org/wiki/Papercutting - general information about the art of papercutting

http://www.banksy.co.uk/ - very interesting socially conscious artist who uses silhouette often in his work.

http://www.youtube.com/watch?v=WcRr-Fb5xQo - prime example of the use of silhouette in current media.

http://learn.walkerart.org/karawalker - another great socially conscious artist who uses paper cut silhouettes in her art.

Friday, October 23, 2009

the conceptual self portrait, part 1


The idea of a portrait is usually a pretty straight forward one – artwork that depicts an actual person. The outcome can shift though when intentionally creating an alter ego for the subject. It can put the true meaning of “portrait” into question, and instead create a different type of portraiture that balances fiction and reality.

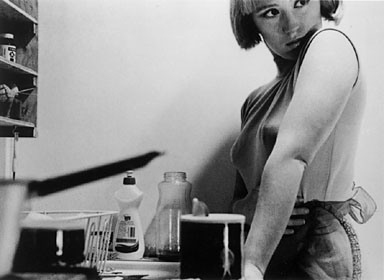
In 1976, a photographer named Cindy Sherman graduated from State University College at Buffalo and moved to New York City. Originally from New Jersey, Sherman quickly immersed herself into the New York art scene. In 1977, she began work on her first series of conceptual self portraits, “The Untitled Film Stills”. The photos depict Sherman dressed as various different unknown film actresses. She fully styles herself into character and manipulates her surroundings for each piece. Her initial shots depict the same blonde woman, and are shot mainly in her own apartment.


For the next group of pictures, Sherman uses college friend Robert Longo’s Long Island beach house as her backdrop. She worked on the series of 69 portraits for three years, until 1980. She experiments with other locations, as well as returning back to the comforts of her own apartment. Sherman creates numerous characters for these portraits, and protects their anonymity by numbering each one and referring to them as “Untitled”.


While “The Untitled Film Stills” may be what Sherman is known best for, she has produced many other notable works. Another conceptual project is her series “Centerfolds” which she was commissioned to create by ArtForum magazine. For these portraits, Sherman wanted to focus on the idea of the objectification of a centerfold pinup girl. These non-traditional photos are meant to inspire thought about what one expects when flipping to the center of a magazine.


Although Sherman has denied that her work is overtly feminist, video clips like this one suggest otherwise.

(ed note: i realize this video is a bit risque for younger children, and would only work as an example with more mature students.)

Thursday, October 22, 2009

the conceptual self portrait, part 2


Local Philadelphia artist, Liz Rywelski puts her own spin on the idea of conceptual self portraits with her series entitled "American Portraits". For this project, Rywelski assumes a temporary identity and visits Kmart photo studios, asking for assistance on how to best style herself for the shots. She will assume the role of a girlfriend sending pictures to her boyfriend overseas, a recent college graduate wishing to send her family current pictures, as well as various other personalities. Instead of being the sole creator of her portraits, she lets the vision of the Kmart employee shine through - allowing them to fully use their own insights and ideas instead of her own. As opposed to Cindy Sherman, who she is sometimes compared to, Rywelski's own image of herself is completely removed from each situation. The employee becomes the facilitator of each piece, and Rywelksi removes her hand from the project entirely. While Sherman completely structures how her conceptual portraits are created, Rywelski relinquishes all control and allows the employees to decide what looks best. The final products are a combination of portraits and performance art, and definitely unique.

Resources:
space 1026
Liz Rywelksi - Identity Performance & Meta Performance

Wednesday, October 21, 2009

the conceptual self portrait, part 3

conceptual art
: an art form in which the artist's intent is to convey a concept rather than to create an art object
self portrait: a portrait of oneself done by oneself

Classroom Discussion about Conceptual Self Portraits:

1. What is a self portrait?

2. Have you ever had a portrait taken of yourself? Where? What were the circumstances?

3. Consider the works of both Cindy Sherman and Liz Rywelski, and their different approaches to their pieces. What approach is more interesting to you?

4. How do these portraits differ from traditional self portraits?

5. How are they the same?

6. If you could assume any identity for a Conceptual Self Portrait, what would it be?


Activity:

Create an alter-ego for yourself and consider how you can express this using clothing, accessories, background, setting, etc.
Choose between taking an actual photograph of yourself, like Sherman and Rywelksi, or drawing the version of yourself using your preferred medium.
Present the work to class and describe all the details that make this portrait of yourself different than who you are every day. Remember you are conveying a concept instead of reality.


Resources:

additional examples of conceptual self portraits
Cindy Sherman
Liz Rywelski

Tuesday, October 20, 2009

Webquest - Become an Art Collector!

Introduction:

Art, in some form or another, has been around since the beginning of human's time on Earth. In modern society, we are lucky to have the tools to educate ourselves about the subject, without even leaving our house. While nothing can replicate the experience of seeing a work of art face-to-face, we are often able to view works digitally that we could not otherwise experience.


Task:
- Familiarize yourself with various different types of artwork and determine which pieces you would like to have in your own personal "art collection".
- Be sure to save images that you like to a folder on your desktop.
- Make sure to keep track of the artist and time period in which each piece was created, as this will help you flesh out your opinions.
- Name each file with the name of the artist and image title.
- Keep a detailed journal of your experience in collecting these images. This can be used for your reflective paper assignment (see below).

This WebQuest will help strengthen your knowledge of Art History, as well as your aesthetics and critical eye.

(Bonus points if you can name the artist and title of any of the images used on this page!)

Here are some great sites to use as resources:

Art History Resources on the Web

Art Images for College Teaching

Mother of All Art and Art History Links

OWL at Purdue University: Using Modern Language Association (MLA)


The Artchive

The Art History Network

The World Wide Web Virtual Library: History of Art

Philadelphia Museum of Art


As you embark on your WebQuest, be sure to keep in mind the Principles of Art -

Form

Line

Shape

Color

Texture

Space

Value


Once you have compiled your collection (of at least 25 pieces of art), write a 3 page reflection that considers the following:

- Why did you choose the works that you did?
- Do you see a theme in the works of art that you are attracted to?
- What was your favorite piece? Why?
- What did you learn on this WebQuest?
- Did you find other artists or periods of art interesting, even if they did not make it into your personal "Art Collection"? How so?

Then, choose one image and write a one-page conclusion of how the Principles of Art are reflected in that particular piece as well as the historical reference / context of this particular piece of work. This will be in addition to your 3 page reflective paper above. (The image you choose does not have to be your favorite image.)